How to Choose Solar Power Panels for Your Home?
Choosing solar power panels for your home is not simply a matter of buying the highest-efficiency model. The best fit depends on your roof, household electricity use, local weather, and budget. Small details matter. A vent, chimney, or maple tree can cast shade across a roof section and reduce a system’s output. Even the direction and pitch of the roof can affect how much sunlight panels receive.
Start by reviewing recent electricity bills to understand how much power your household uses, including seasonal changes. Then compare panel efficiency, product and performance warranties, and the installer’s experience. Ask how the proposed system will perform on your specific roof, not just under ideal test conditions. Request an estimate showing expected annual production and the assumptions behind it. Numbers are useful, but they are estimates.
It can be tempting to focus on panel price alone. Yet inverter choices, installation quality, roof condition, and future maintenance also affect long-term value. Check that product specifications and warranty terms come directly from manufacturers, and ask qualified installers to explain any claims you cannot verify. There is no perfect panel for every home. A smaller system may suit a shaded roof better than a larger one, though that can be disappointing. Careful comparisons help you choose solar power panels that match real household needs rather than a sales pitch.
Assess Home Electricity Use and Roof Potential with NREL PVWatts
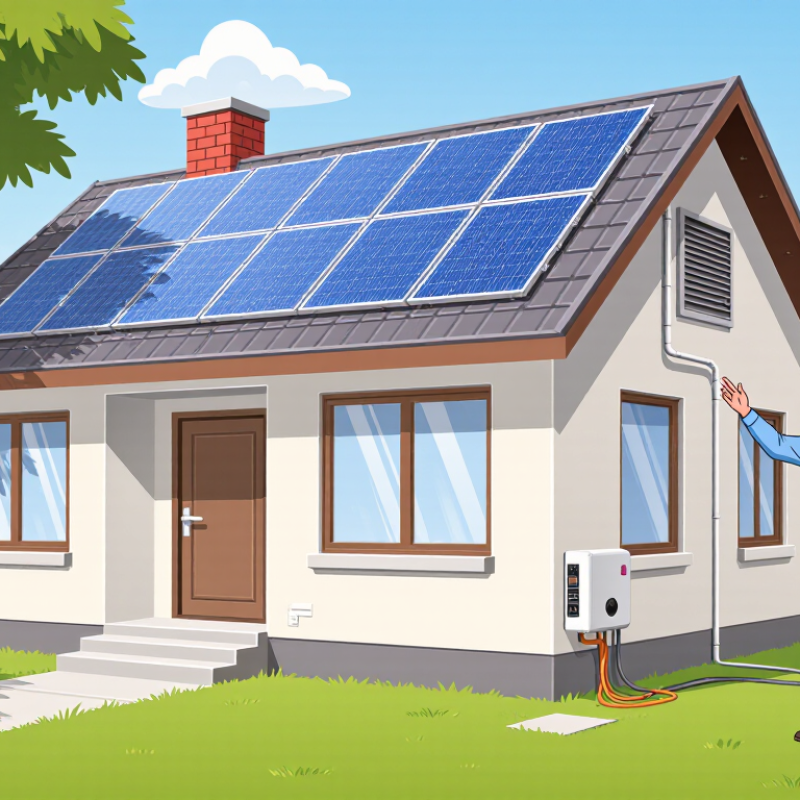
Before comparing solar systems, collect 12 months of electricity bills and note seasonal peaks. The U.S. Energy Information Administration reported average household electricity use of about 10,791 kilowatt-hours in 2022. That national figure is a reference, not a target. A home with electric heating or a planned vehicle charger may use much more. Enter your location and monthly usage into NREL PVWatts, then test different system sizes, roof tilts, and orientations. Small details matter.
Walk around the roof and note shade from chimneys, nearby trees, and neighboring buildings. Check usable roof area and whether repairs may be needed before installation. NREL’s PVWatts documentation uses a default 14% system-loss assumption, covering factors such as wiring, inverter, and soiling losses. Real roofs differ. The calculator cannot inspect a particular tree’s afternoon shadow, so adjust assumptions and ask an installer to assess shading on site. Compare monthly estimates with your bills, not just the annual total. I would avoid sizing a system from one neat estimate alone; weather and household routines shift, sometimes in inconvenient ways.
Size the System for Local Sunlight, Roof Area, and Seasonal Demand
Start with twelve months of electricity bills, not the size of a neighbor’s system. Note monthly kilowatt-hour use and expected changes, such as adding an electric vehicle or heat pump. Compare that demand with local peak-sun hours, which vary by season and weather. A winter-heavy household may need more panel capacity than annual averages suggest. Cloudy afternoons matter. Ask for production estimates by month, not just a yearly total. Check shading from chimneys, trees, and nearby buildings; even a small shadow can reduce output across connected panels.
Measure usable roof area, including space lost to vents, skylights, and required access paths. Panel dimensions and roof pitch affect how many panels will fit and how well they can capture sunlight. More panels are not always better. An aging roof may need repairs before installation, so include its condition in the plan. Have a qualified installer model the roof using local weather data and explain the assumptions behind the estimate. Estimates are still estimates; I would question any projection that ignores winter use or afternoon shade. On a tight roof, compare the expected yearly output per panel with your actual seasonal needs, rather than choosing by panel count alone.
Compare Panel Ratings at STC: 1,000 W/m², 25°C, and AM1.5
How to Choose Solar Power Panels for Your Home?
When comparing solar panels, check their ratings under Standard Test Conditions (STC): 1,000 W/m² of sunlight, a cell temperature of 25°C, and an AM1.5 spectrum. These shared conditions make manufacturers’ power ratings easier to compare. A panel rated at 400 watts should produce that output under the test setup, not necessarily on your roof. Real roofs differ. Heat, shade, panel angle, and wiring can all affect daily energy production. A sunlit laboratory is not a summer rooftop.
Tips: Compare panels using the same STC figures, and check both rated power and efficiency. Note the dimensions, too: a higher-wattage panel may be larger, which matters when roof space is limited. Ask an installer to estimate output using your roof’s orientation and shading, rather than relying on the label alone.
STC is useful, but it is only a comparison point. Roof-mounted cells can become much hotter than 25°C, even on bright days, and nearby trees may cast changing shadows. Review the panel’s temperature coefficient and the assumptions behind any production estimate. I would not choose a panel from its wattage alone; that shortcut can miss practical constraints. Even careful estimates have limits, so compare expected output with your household’s actual electricity use.
Evaluate Shading and Long-Term Output: NREL Reports ~0.5% Annual Degradation
Shading can quietly undermine a system’s long-term output. Check the roof at several times of day, not just during a sunny afternoon. A chimney may cast a narrow shadow in winter, while nearby trees can grow into the sun’s path. Look for shade across the proposed panel area, and ask for an hourly or seasonal shade assessment. Small shadows matter.
NREL researchers Dirk Jordan and Sarah Kurtz reviewed more than 2,000 published photovoltaic degradation rates. Their 2013 analysis found a median decline of about 0.5% per year. That is an industry-wide reference, not a guarantee for a particular roof. At that rate, output after 25 years would be roughly 12% below the starting level, before considering shade, dirt, or equipment issues. The estimate is useful, but imperfect. Ask installers to show projected yearly production and explain their assumptions about shading and degradation. Compare those assumptions with your roof’s actual sun exposure, including winter conditions. A careful estimate should distinguish reduced sunlight today from gradual panel aging over time.
Compare Product Quality, Installer Credentials, and 25-Year Performance Warranties
A solar panel’s appearance tells you little about its long-term quality. Compare published output, temperature performance, and degradation rates, not just the wattage on the front page. Ask for the product and performance warranty documents before signing. They are not always the same warranty. A 25-year performance warranty may promise a minimum output by year 25, while excluding labor, removal, or shipping costs. Read the exclusions. Check who handles claims if the installer is no longer operating.
Installer credentials matter just as much as panel specifications. Verify current electrical and solar qualifications, insurance, and experience with roofs like yours. Ask for recent local references, then ask what happened when a system needed repair. A careful installer should explain permits, roof penetrations, wiring routes, and expected production in plain language. Look closely at the proposal’s assumptions: shade from a chimney at 3 p.m. can change the estimate. Small detail, real impact.
Compare workmanship coverage separately from equipment warranties, and get every promise in writing. Ask who pays for labor if a panel fails in year twelve. Also check whether the warranty requires registration or specific maintenance records. I might still miss a clause on a first read; these documents can be dense. Have the installer point to the exact terms, rather than relying on a sales conversation. A realistic proposal may feel less exciting, but it gives you clearer grounds for comparing quality and service.